I recently created AlloyActionJackson to test Action Bar and Tab Bar functionality in Appcelerator Titanium. I am also using it to test out some custom Holo styling, which I’ll detail here.
If you are looking for info on Action and Tab bar stuff, check out this post. If you want to create custom Action Bar and Holo themes for Android apps using Titanium, read on.
When looking around on how to do this, I came upon Rafael Kellermann Streit’s very handy post on adding custom Holo themes to Android/Titanium, as well as Juhani Lehtimaki’s (I hope I said that right) useful post on how to use both custom themes at once. and I’d like to expand on it a bit and share my experiences. There is some stuff here that is a repeat of his post, and some new stuff as well.
There are some excellent tools and resources for creating custom Holo Themes at the Android Asset Studio. We’ll go through two of the tools for generating custom colors.
Note: If you want to follow along with the code, fork the AlloyActionJackon repo.
Part I: Create and Implement the Action Bar Style
1) Generate the Action Bar Style
The Action Bar Style Generator is pretty self explanatory, just go through and adjust the colors to your liking, and a preview will be generated on the right.
Notes:
- Style name should be a single word with no punctuation. In my example, I named it Action.
- Style Compatibility should be set to Holo
Once you are ready, click Download ZIP to get the files
2) Add the Files to Your Titanium Project
When you extract the zip file created in Step 1, you will get a res folder. Add this folder to your project under platform/android.
Notes:
- The platform folder should be at the project root, at the same level as Resources, and tiapp.xml.
- If the folders don’t exist, go ahead and create them. If they do, and you already have a res folder in there, then you will need to copy in the new files into their appropriate locations.
3) Modify tiapp.xml to Use the New Action Bar Style
We need to set the style in the AndroidManifest.xml file, which we can do through tiapp.xml. Just add this:
<android xmlns:android="http://schemas.android.com/apk/res/android"> <tool-api-level>14</tool-api-level> <manifest> <application android:theme="@style/Theme.Action"/> <uses-sdk android:minSdkVersion="14" android:targetSdkVersion="16"/> </manifest> </android>
Notes:
- You must have Android SDK 4.0 installed (API 14), as this is what we are specifying in the <tool-api-level>. This is needed even if building to a device or emulator with a different SDK.
As Rafael mentioned in his post, this will set the Theme to be used by the app, and specifies the minimium Android SDK, needed to use Holo themes.
4) Run the Project
Now you should clean your project (in Studio: Project > Clean…) and run it on a device or emulator that supports Holo.
Part II: Create Custom Colors For Other Holo Controls

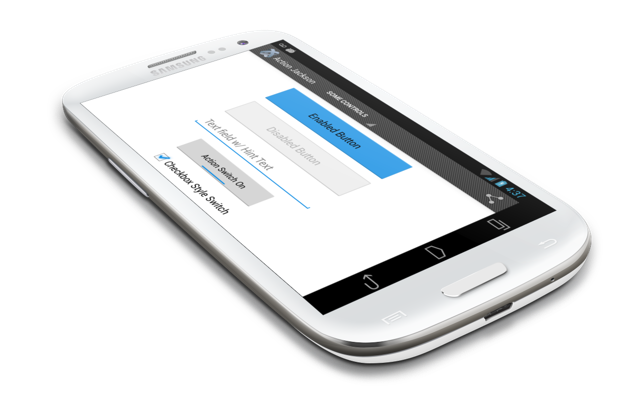
Now that Part 1 is complete, we have a nice custom looking Action Bar and Tab Group. But what about custom colors for the rest of the controls (widgets), like buttons and switches and stuff? This is handled with another Style Generator, which we will walk through now.
1) Generate the Second Theme
The Android Holo Colors Generator is a similar to the Action Bar generator, but here you just set a single color and then optionally select which control’s styles you want generated.
Notes:
- This is important: Make the Theme Name is something different than the name in Part 1. Again, use a single word with no punctuation. I named mine Jackson.
- Pick the same Theme option (Holo Light, Dark, etc) as you used in Part I.
- Pick any of the controls except the following. These use a separate library that doesn’t come with Android by default.
- Numberpicker (leave as No)
- Switch (leave as No)
When ready, click the Download ZIP button.
2) Merge the New Files into platform/android/res
Our extracted files will have the similar folder structure as with the Action Bar files, plus an extra folder or two. We need to merge these folders together into our project. Since this new theme also contains some style files for the action bar and tabs, there could have been some overlapping files, but since the Action Bar generator appends the theme name to the file names, we don’t have to worry about overwriting anything. We’ll get into how the app will know which files to use in a minute.
If you get some overwrite warnings, then you didn’t use a different theme name for Part II. Shame on you. Can’t even follow simple directions. Really.
3) Get the App to use the Second Theme By Setting it as a Parent
Now that we have the other theme’s files added, we need the app to know to use them. We can’t add an entry to tiapp.xml like we did with the action bar theme, since that would reverse those changes. Instead, we simply set the action bar theme to use this new theme as a Parent.
Go to platform/android/res/values/styles_actionBarThemeName.xml, and look for the line that looks similar to this:
<style name="Theme.MyActionBarTheme" parent="@android:style/Theme.Holo.Light.DarkActionBar">
We need to change the parent attribute to be our 2nd theme, like so:
<style name="Theme.MyActionBarTheme" parent="@style/MySecondThemeName">
If you forgot your second theme’s name already, you can find it under platform/android/res/values/themes_mysecondthemename.xml. One of the first entries will start with <style name=”My2ndThemeName…
So now we have our app using our Action Bar theme, whose parent is our 2nd Theme that contains the styles for the rest of the controls, whose parent is a default Holo theme.
4) Fix a Little Bug
Appcelerator was balking at an entry in one of the 2nd theme’s style files that was referencing a drawable called @color/transparent. Thanks to this Stack Overflow post, I was able to work around it. So, if you get this error:
...res/drawable/item_background_holo_light.xml:25: error: Error: No resource found that matches the given name (at 'drawable' with value '@color/transparent').
Then open the item_background_holo_light.xml file and replace the following file:
<item android:drawable="@color/transparent" />
With this one:
<item android:background="@android:color/transparent" android:cacheColorHint="@android:color/transparent" />
After that, do a Project > Clean… and build your app.
If you run into issues, go over Part II again and make sure you only picked the correct controls.
Also See:
Alloy Action Jackson: An Action Bar Demo for Appcelerator Titanium
Update 12/28/13
Also check out this gist from @ricardoalcocer with more info on Android theming.
You must be logged in to post a comment.